Cart
0
You've priced out both options and the gap is real. A pack of bare rocker switches costs noticeably less than a pre-wired panel. So you do what any sensible DIYer does: you stare at both listings, wonder how hard the wiring actually is, and then buy whichever one is in your cart when you get impatient.
That impulse buy is where most of the regret happens. Not because either format is wrong, but because the right one depends entirely on your setup, your tools, and how much of your Saturday you're willing to spend debugging a connection that looks fine but isn't.
Here's an honest walkthrough of what each path actually costs you.
What You're Actually Comparing
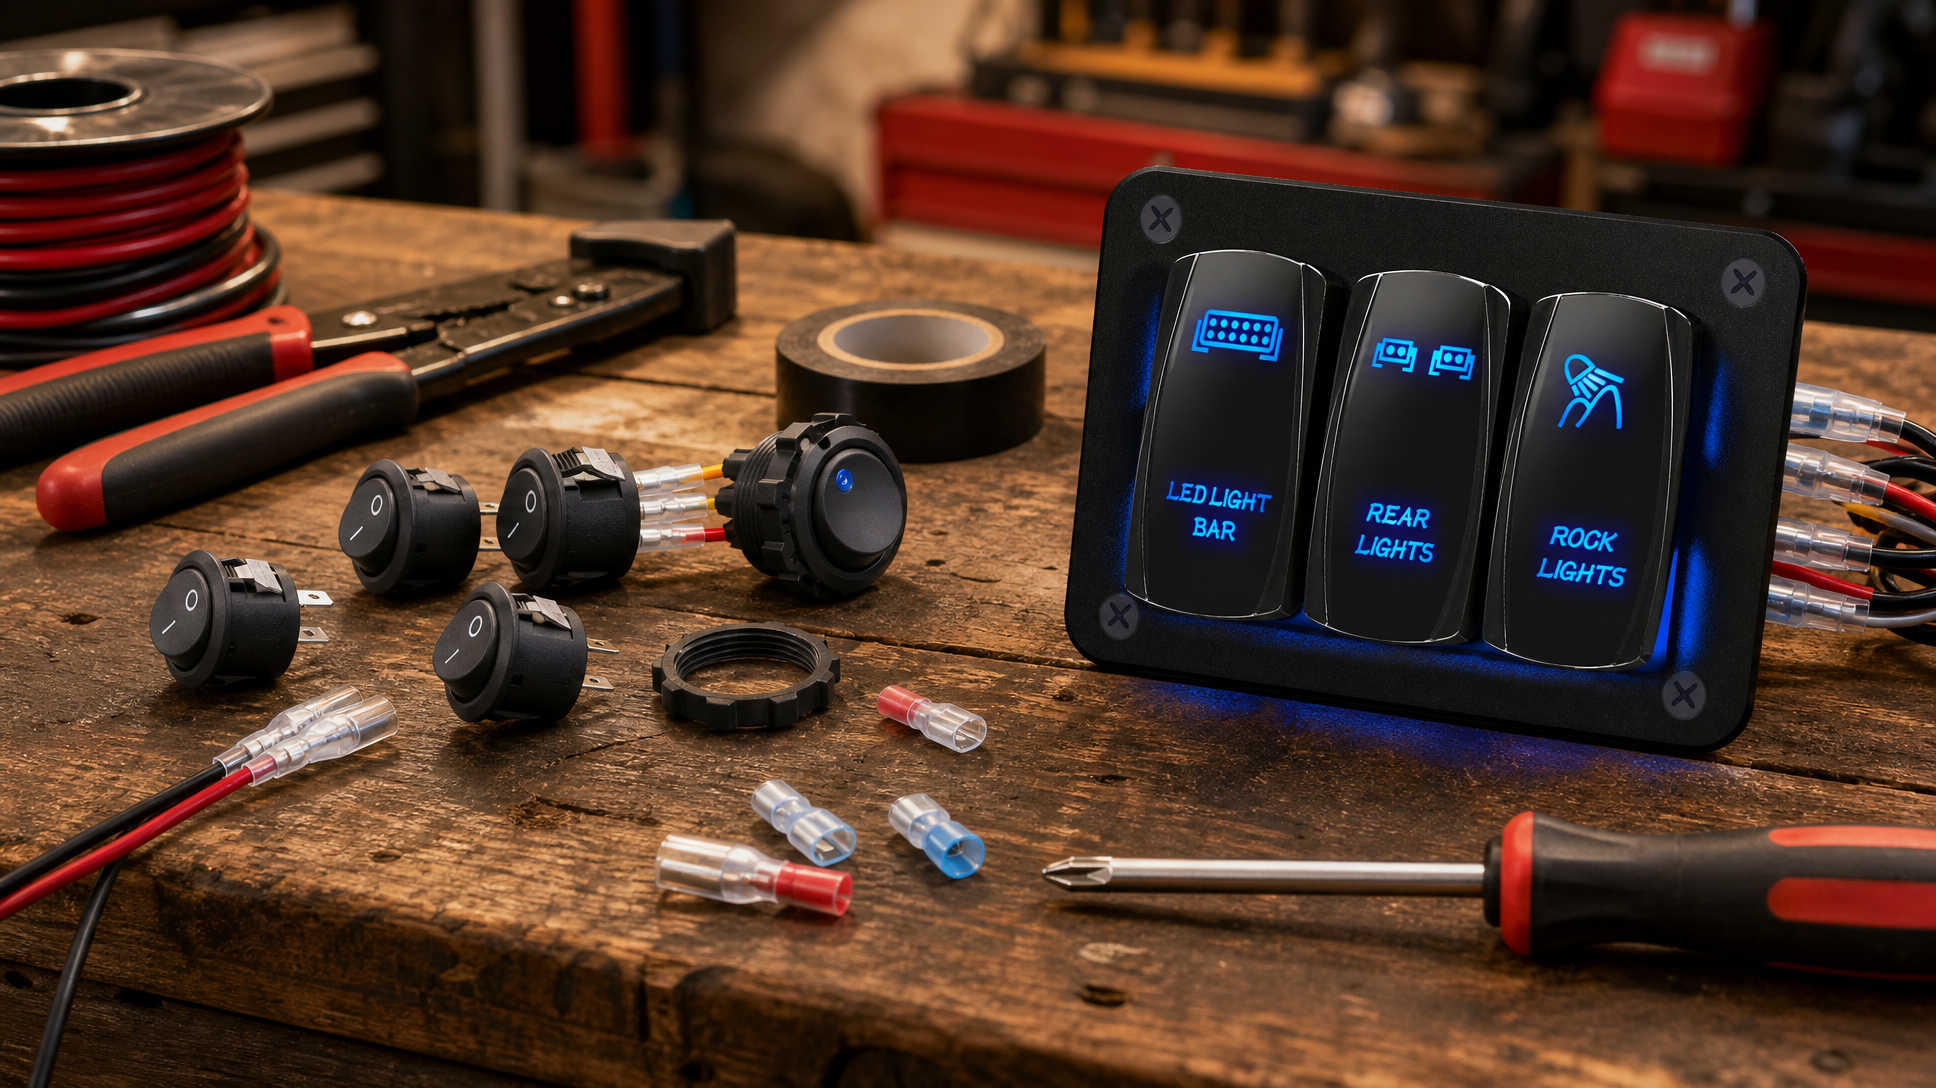
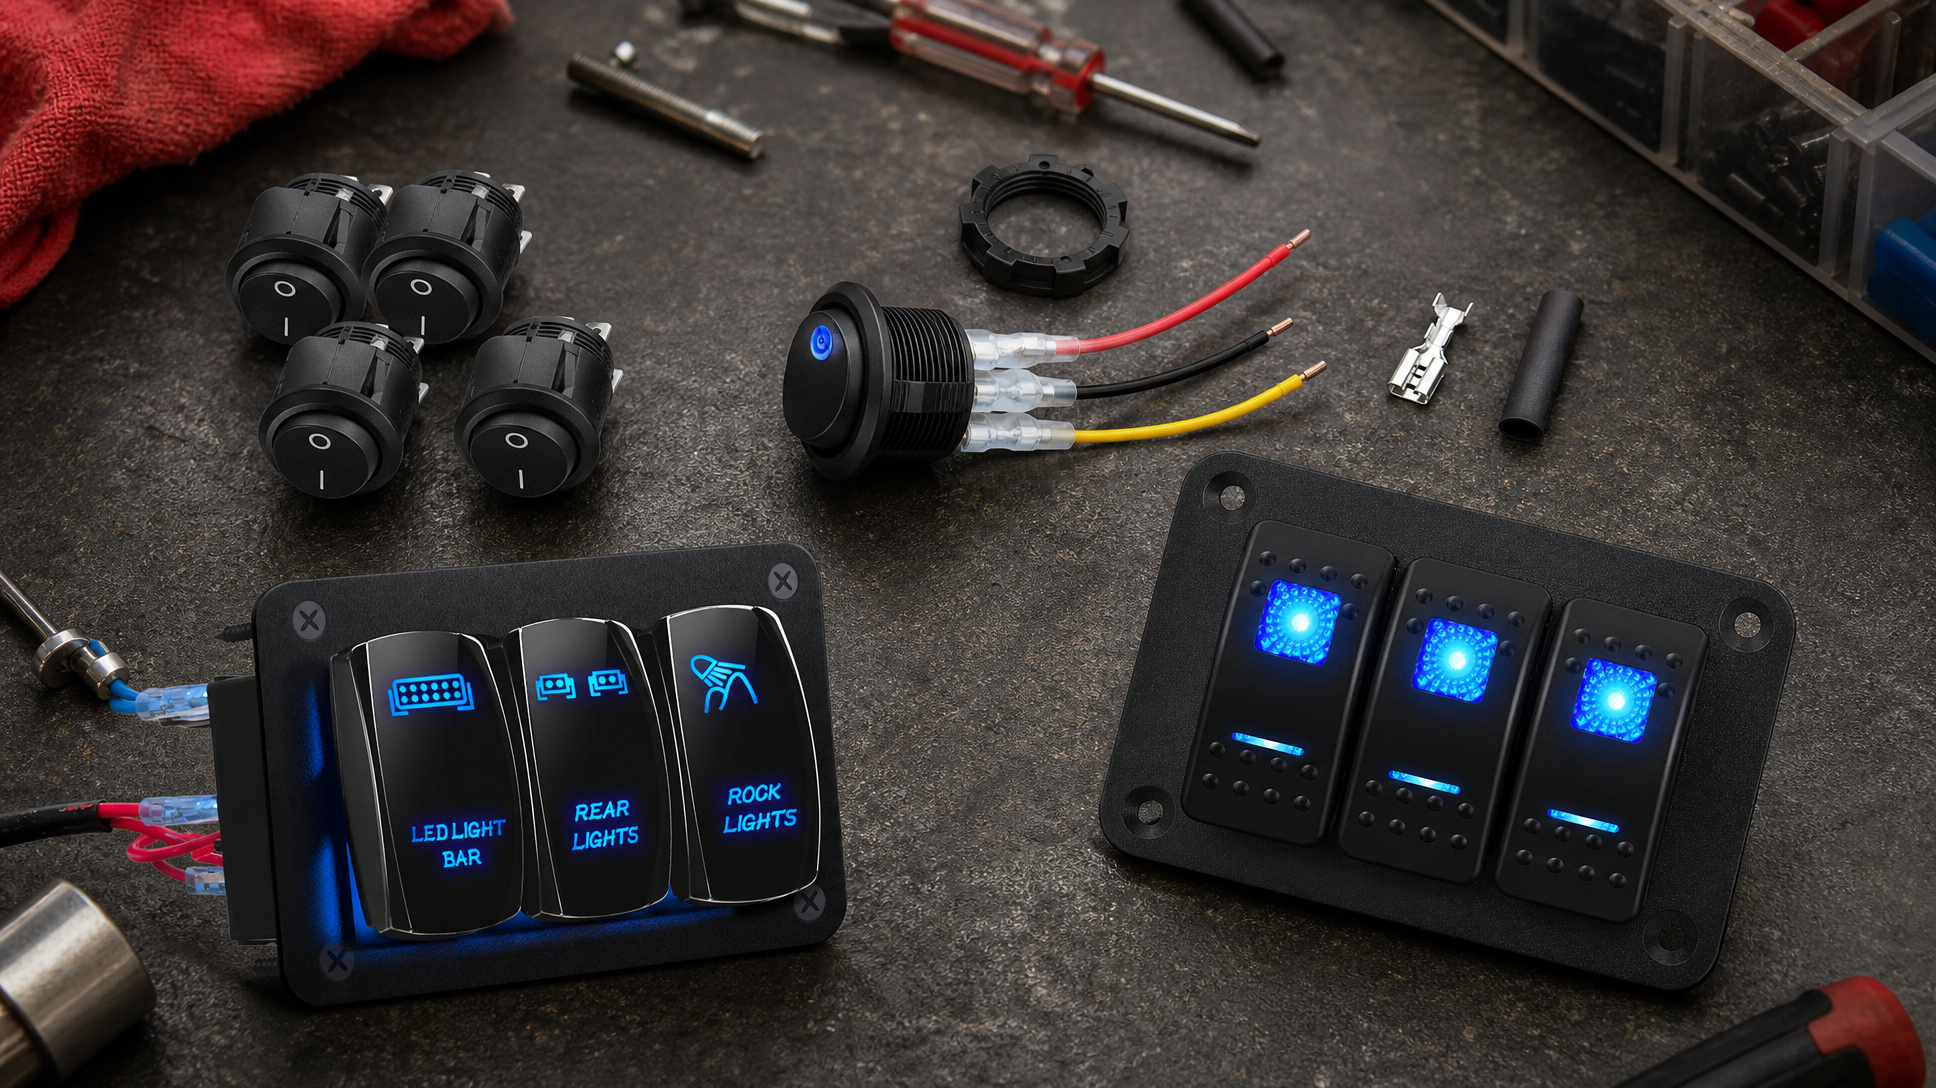
On one end: individual rocker switches like the Daiertek On Off Round Rocker Switches SPST 20mm Mini 12V DC — KCD1 5-Pack. These are compact, round, black SPST switches that come with pre-attached red and black wire leads already crimped on with clear connectors. You're getting the switch and a short wire pigtail. Everything beyond that — routing, fusing, mounting — is on you.
On the other end: a panel like the Daiertek Marine Switch Panel Waterproof 12V 3 Gang Rocker Switch Panel, which is a black aluminum panel with three blue LED rocker switches already mounted and wired together. It comes pre-wired, meaning the internal connections between switches are done. You run power, ground, and your accessory wires to the panel's harness — and you're done.
The Daiertek LED Light Bar Switch Panel 3 Gang (labeled for LED light bar, rear lights, and rock lights) and the Daiertek Round Rocker Switch Shell 12V Lighted 3 Pin with Blue LED sit between these two extremes — the lighted 3-pin switch gives you more connection options than a basic 2-pin, while the labeled gang panel gives you an organized, purpose-built control surface right out of the box.
The question isn't which one is better. It's which one is right for your situation.
The Bare Switch Path: What It Actually Takes
A 2-pin SPST rocker switch is about as simple as a switch gets — power in, power out. If you're wiring one into a single accessory circuit (a fan, a light, an auxiliary relay), the process is genuinely straightforward:
- Identify your power source and run a fused wire to the switch's input terminal.
- Run a wire from the output terminal to your accessory.
- Connect your ground separately at the accessory.
- Mount the switch in a drilled hole (typically around 20mm for a round rocker like the KCD1).
That's it. If you're doing one switch, this is fast. The pre-attached wire leads on the KCD1 pack mean you're not starting from bare terminals — you just need to extend or connect those leads into your circuit.
Where it gets messy is when you need three, four, or five switches. Now you're running multiple fused circuits, managing a tangle of individual wires behind a panel, and hoping every connection holds. Each additional switch multiplies the number of points where something can go wrong. A loose spade connector on switch three that you don't catch until you've already buttoned up the dash is a genuinely miserable afternoon.
The 3-pin lighted switch (the Daiertek Round Rocker Switch Shell with Blue LED) adds one more layer: the LED indicator needs its own connection, usually to a constant 12V source so it illuminates when the circuit is live. That third pin is a small thing, but if you're not used to it, it's a common source of confusion — people wire the LED pin to the wrong terminal and wonder why the light is always on, or never on.
The Pre-Wired Panel Path: What You're Actually Paying For
A pre-wired panel like the Daiertek Marine Switch Panel collapses all of that internal wiring work. The switches are already mounted in the aluminum panel, the LED connections are already made, and the wiring harness exits the back of the panel with labeled leads. Your job is to connect the harness to your vehicle's power, ground, and accessory outputs — not to wire each switch individually.
For a three-circuit setup (say, a light bar, rear lights, and rock lights), that's the difference between managing roughly a dozen individual connections versus making three or four clean terminations at the harness. The labeled LED Light Bar Switch Panel makes this even cleaner because each switch position is already identified — you're not guessing which rocker controls which circuit.
The waterproof aluminum construction on the marine panel also matters if your install is anywhere that sees moisture — engine bays, boats, UTVs, truck beds. Bare switches mounted in a DIY panel are only as waterproof as whatever housing you build around them.
The honest trade-off: pre-wired panels are less flexible. The switch positions are fixed, the wire lengths are what they are, and if you need a non-standard configuration, you're either modifying the harness or choosing a different product. Bare switches let you build exactly what you need — if you have the time and the skills to do it cleanly.
The Real Cost: Time and Mistakes, Not Just Money
Here's how to actually decide:
Go with bare switches if: You're adding a single circuit, you already have a wiring harness or relay setup you're tapping into, or you need a specific switch placement that a panel can't accommodate. The KCD1 5-pack is ideal for this — low cost, simple connections, and enough switches to handle a few separate circuits without overcomplicating things.
Go with a pre-wired panel if: You're controlling three or more accessories, you want a clean finished look on your dash or console, or you don't want to spend time troubleshooting individual connections. The time you save on internal wiring typically more than justifies the price difference — especially on a first install.
The mistake most people make: Buying bare switches for a multi-circuit install because they're cheaper, then spending three hours on wiring that a pre-wired panel would have resolved in thirty minutes. The switch pack costs less. The install doesn't.
If you're not sure which format fits your build, browse the Accent & Off Road Lighting collection to see how these switches fit into a broader lighting setup — it helps clarify how many circuits you're actually dealing with before you commit to a wiring approach.
A Quick Side-by-Side
- Bare rocker switch (2-pin SPST): Lowest cost, maximum flexibility, most wiring work per circuit, best for single or simple installs.
- Lighted 3-pin rocker switch: Adds LED indicator, one extra connection required, good middle ground for visible status feedback.
- Pre-wired labeled switch panel: Most time-efficient for multi-circuit installs, clean finished look, less flexible for custom configurations.
- Pre-wired waterproof aluminum panel: Best for harsh environments (marine, off-road, truck beds), combines durability with installation speed.
None of these is the wrong answer. They're just different answers to different problems.
If you're doing a multi-circuit install and want it done right the first time, browse Carkart's switch and accessories lineup — the pre-wired panels are there when you're ready to skip the wire-sorting step entirely.
Frequently Asked Questions
Can I use a 2-pin SPST rocker switch for accessories that need a ground connection at the switch?
A standard 2-pin SPST switch interrupts only the positive (power) side of the circuit — the ground runs directly to the accessory, not through the switch. This is the most common wiring approach for simple 12V accessories. If you need a switch that handles both positive and ground (for isolation purposes), you'd want a different switch type entirely.
What does the third pin on a lighted rocker switch actually do?
On a 3-pin lighted rocker, the third terminal powers the LED indicator inside the switch. It's typically connected to a constant 12V source so the LED illuminates whenever the circuit is live — giving you a visual confirmation that the switch is on. If you wire it to the wrong terminal, the LED may stay on all the time or not light up at all, which is a very common wiring mistake.
Do pre-wired switch panels work with any 12V vehicle?
Pre-wired 12V panels are designed for standard 12V DC electrical systems, which covers the vast majority of cars, trucks, SUVs, boats, UTVs, and RVs. Always confirm your vehicle's system voltage matches the panel's rated voltage before connecting. Most modern passenger vehicles and light trucks run 12V DC systems, but some specialty equipment differs.
Is a pre-wired panel actually waterproof, or just water-resistant?
The term "waterproof" in product listings for switch panels typically refers to resistance to splashing and moisture exposure rather than full submersion. For marine and off-road use, this level of protection is generally sufficient for the environments these panels are designed for — rain, spray, and humidity. If you need submersion-level protection, check the product's specific IP rating before purchasing.